Introduction
Banana cheesecake brings two comforting desserts together in a single slice. When you blend the rich texture of cream cheese with the familiar taste of mashed banana, you create a smooth and satisfying dessert that can please even the pickiest sweet tooth. Some folks compare it to a classic banana pudding cheesecake recipe, while others say it reminds them of homemade banana bread with a creamy twist. Regardless of how you describe it, this treat offers a balanced blend of sweet fruit and tangy dairy.
Crafting a banana cheesecake from scratch might sound a bit involved, but the process is more straightforward than you’d expect. All it takes is proper preparation, a touch of patience, and a few helpful tips. By using the right ingredients—ripe bananas, fresh cream cheese, and just the right amount of sweetness—you’ll discover how easy it can be to produce a dessert that feels luxurious yet welcoming. In fact, many home bakers find that once they learn to make a cheesecake at home, they rarely go back to store-bought alternatives.
In the sections that follow, you’ll see why this particular cheesecake recipe can be an instant favorite. From selecting bananas at their peak sweetness to building a well-structured crust, each step ensures your finished product has the perfect blend of flavor and creaminess. By the time you’re ready to serve, you’ll have a crowd-pleasing showstopper that looks and tastes like it came straight from a professional bakery.
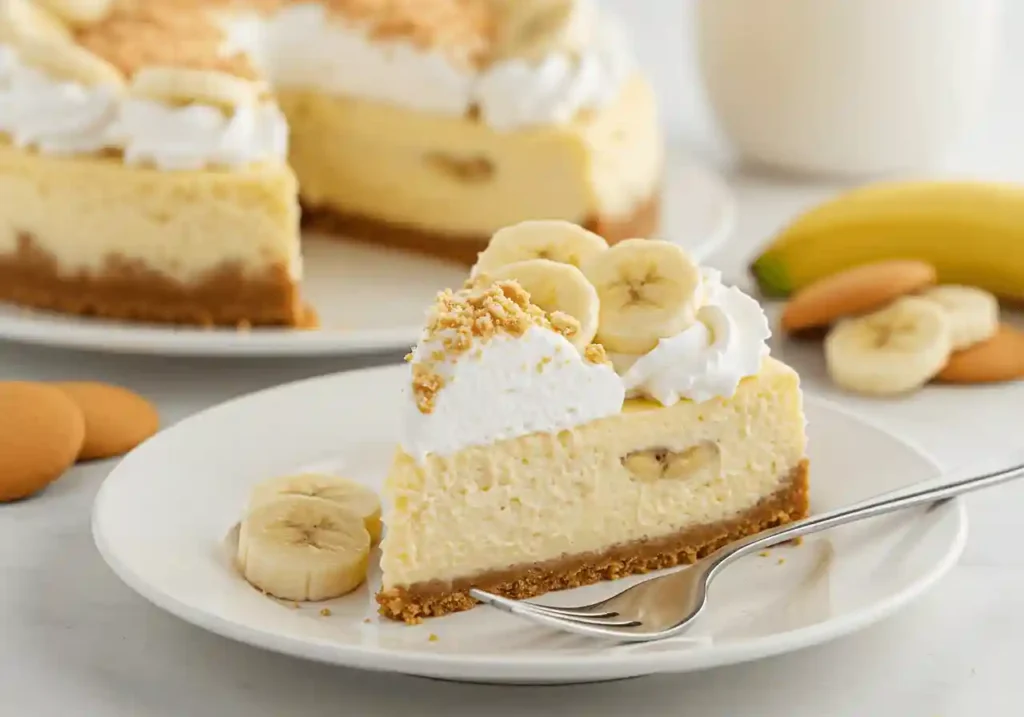
Table of Contents
Key Benefits
Making banana cheesecake at home offers many perks that go beyond basic sweetness. First, there’s the unbeatable taste of fresh banana paired with tangy cream cheese. When you select ripe bananas at their peak, you’re rewarded with a natural flavor that makes each slice stand out. This unique twist blends the comforting notes of banana bread with the smooth consistency of a traditional cheesecake.
Another bonus is control over ingredients. You can adjust the amount of sugar, choose your preferred crust—whether it’s a crisp graham cracker layer or a wafer crust—and tweak the topping. This freedom lets you create a dessert that matches your exact preferences. Some bakers enjoy adding a hint of banana extract to dial up the banana flavor, while others prefer the subtle taste of mashed bananas alone.
There’s also satisfaction in the process itself. As you mix, bake, and chill your cheesecake, you learn new skills that help you feel at ease in the kitchen. Once you try a full recipe and see how attainable a homemade banana cheesecake can be, you’ll realize it’s not necessary to rely on a store-bought product. The result is a velvety dessert that consistently impresses guests and family members. Whether you enjoy a plain slice or top it with whipped cream and extra banana slices, the experience is rewarding from start to finish.
Ingredients
Below is a list of the primary ingredients for this banana cheesecake recipe. These items ensure a balance of sweetness, texture, and that familiar banana flavor. Feel free to adjust sugar levels or choose a wafer crust over a graham cracker crust if you prefer a slightly different crunch. If you want a banana pudding cheesecake twist, you can also incorporate a bit of vanilla pudding mix for an extra layer of creaminess.
Crust Components
- 1½ cups graham cracker crumbs or Nilla wafer crumbs
(Either choice brings a sweet, crunchy base. If you don’t have a food processor, you can crush crackers or wafers in a sealed plastic bag.) - 6 tablespoons unsalted butter, melted
- ¼ cup granulated sugar
- Pinch of salt
Tip: You can make the crust using a food processor for a fine, even texture. For an authentic nilla wafer crust, swap graham cracker crumbs with crushed wafers.
Cheesecake Filling
- 24 ounces cream cheese, softened
(Three standard 8-ounce packages. Softening makes it easier to beat the cream cheese on medium speed.) - 3 ripe bananas, mashed
(Look for bananas with brown speckles for maximum sweetness.) - 1 cup granulated sugar
- 3 large eggs, at room temperature
(Add them one at a time for a smoother blend.) - 1 cup sour cream
- 1 teaspoon banana extract (optional)
(Enhances banana flavor if your bananas are slightly under-ripe.) - ½ teaspoon vanilla extract or the seeds of half a vanilla bean
Using sour cream in the cheesecake filling results in a rich, creamy banana cheesecake. If you want a banana pudding spin, stir a few tablespoons of banana pudding mix into the batter.
Optional Toppings
- Whipped cream
(A swirl of homemade whipped cream on top of the cheesecake adds a light finish.) - Additional banana slices
(Place them on the finished cheesecake just before serving so they stay fresh.)
Essential Tools
- 9-inch springform pan
(Ensures your cheesecake bakes evenly and releases easily.) - Stand mixer or hand mixer
(A bowl of a stand mixer helps you combine everything efficiently.) - Food processor (if you like a fine crust texture)
- Aluminum foil
(Helps protect the cheesecake pan if using a water bath.) - Large roasting pan (optional for water bath)

Instructions
Making a creamy banana cheesecake from scratch may look difficult at first, but following these steps keeps the process simple. Feel free to reference these instructions as you go, and remember to gather all your equipment—such as a food processor, mixing tools, and a springform pan—before you begin.
Step 1: Make the Crust
- Crush the crackers or wafers
- If you prefer a graham cracker crust, add the crackers to a food processor and pulse until you get a fine crumb.
- For a nilla wafer crust, swap the crackers for wafer cookies. You can also crush them in a sealed plastic bag using a rolling pin if you don’t have a food processor.
- If you prefer a graham cracker crust, add the crackers to a food processor and pulse until you get a fine crumb.
- Combine with butter and sugar
- Mix your crumbs with melted butter, sugar, and a pinch of salt in a medium bowl. Stir until the texture is moist and sticks together when pressed.
- Mix your crumbs with melted butter, sugar, and a pinch of salt in a medium bowl. Stir until the texture is moist and sticks together when pressed.
- Press into the pan
- Lightly grease a 9-inch springform pan.
- Pour your crumb mixture into the pan and use the bottom of a measuring cup or spoon to press it firmly into an even layer. Go slightly up the sides if you like a taller crust.
- Lightly grease a 9-inch springform pan.
- Bake the crust
- Place the pan on a baking sheet and bake for about 8 to 10 minutes in a preheated oven at 350°F (175°C).
- Take it out of the oven and place the crust on a rack to rest while you get the cheesecake filling ready.
- Place the pan on a baking sheet and bake for about 8 to 10 minutes in a preheated oven at 350°F (175°C).
Step 2: Prepare the Banana Cheesecake Filling
- Beat the cream cheese
- Use a stand mixer or a large bowl with a hand mixer to whip the cream cheese at medium speed until it becomes velvety. This initial step prevents lumps in your finished cheesecake.
- Use a stand mixer or a large bowl with a hand mixer to whip the cream cheese at medium speed until it becomes velvety. This initial step prevents lumps in your finished cheesecake.
- Add the mashed banana and sour cream
- In a separate bowl, mash your ripe bananas. If you want a bold banana flavor, include a small amount of banana extract.
- Add the mashed banana to the cream cheese, followed by the sour cream. Beat until combined, scraping down the sides as needed so that everything blends evenly.
- In a separate bowl, mash your ripe bananas. If you want a bold banana flavor, include a small amount of banana extract.
- Incorporate sugar and eggs
- Gradually mix in your sugar.
- Add the eggs individually, mixing thoroughly after each one. This method ensures your creamy cheesecake filling maintains a velvety consistency.
- Stir in vanilla extract (or seeds from half a vanilla bean) for extra depth. If the recipe calls for it, you can include a few tablespoons of pudding mix for a banana pudding cheesecake hint.
- Gradually mix in your sugar.
- Check your consistency
- The batter should be smooth and pourable. If any lumps remain, continue mixing on low speed until the filling feels uniform.
- The batter should be smooth and pourable. If any lumps remain, continue mixing on low speed until the filling feels uniform.
Step 3: Assemble and Bake the Cheesecake
- Pour cheesecake batter
- Carefully pour cheesecake batter over the cooled crust. Level the surface with a spatula to achieve an even finish.
- Carefully pour cheesecake batter over the cooled crust. Level the surface with a spatula to achieve an even finish.
- (Optional) Use a water bath
- For best results, consider placing the cheesecake pan inside a larger roasting pan. Fill the roasting pan with hot water until it reaches about halfway up the sides of the springform pan.
- This method—sometimes called baking a cheesecake in a water bath—helps regulate heat and reduce the risk of cracks or a sunken center.
- For best results, consider placing the cheesecake pan inside a larger roasting pan. Fill the roasting pan with hot water until it reaches about halfway up the sides of the springform pan.
- Bake the cheesecake
- Return the pan (or the pan-in-a-pan setup) to your oven, still at 350°F (175°C).
- Place the cheesecake in the oven for around 45 to 55 minutes. The center of the cheesecake may still have a slight jiggle, but the edges should look set.
- If the top darkens faster than expected, shield it with a thin layer of foil.
- Return the pan (or the pan-in-a-pan setup) to your oven, still at 350°F (175°C).
Step 4: Cool Completely and Chill
- Allow the cheesecake to cool
- Once baking finishes, switch off the heat and keep the cheesecake inside with the door propped ajar for around 15 minutes, which helps avoid abrupt temperature drops that could result in cracks.
- Once baking finishes, switch off the heat and keep the cheesecake inside with the door propped ajar for around 15 minutes, which helps avoid abrupt temperature drops that could result in cracks.
- Remove the cheesecake
- Lift it out from the heat and place it on a rack to cool. Go around the edges of the cheesecake with a thin knife to loosen it from the sides of the pan. This prevents sticking as it settles.
- Lift it out from the heat and place it on a rack to cool. Go around the edges of the cheesecake with a thin knife to loosen it from the sides of the pan. This prevents sticking as it settles.
- Cool completely
- Allow it to settle at a moderate indoor temperature for at least one hour. Once it is no longer warm to the touch, wrap the cheesecake in plastic wrap or cover the pan and place it in the refrigerator. Refrigerate for a minimum of four hours or leave it to cool through the night. This lets the flavors develop and ensures the finished cheesecake has cooled before slicing.
- Allow it to settle at a moderate indoor temperature for at least one hour. Once it is no longer warm to the touch, wrap the cheesecake in plastic wrap or cover the pan and place it in the refrigerator. Refrigerate for a minimum of four hours or leave it to cool through the night. This lets the flavors develop and ensures the finished cheesecake has cooled before slicing.
Step 5: Add Your Toppings
- Top with whipped cream
- You can use store-bought whipped cream, but a homemade whipped cream made from heavy whipping cream often tastes fresher.
- You can use store-bought whipped cream, but a homemade whipped cream made from heavy whipping cream often tastes fresher.
- Banana slices or other garnish
- Arrange freshly cut banana rounds on the surface right before you serve. This keeps them from turning brown.
- Drizzle with caramel sauce or chocolate sauce if you want a sweeter finish.
- Arrange freshly cut banana rounds on the surface right before you serve. This keeps them from turning brown.
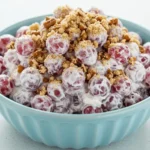
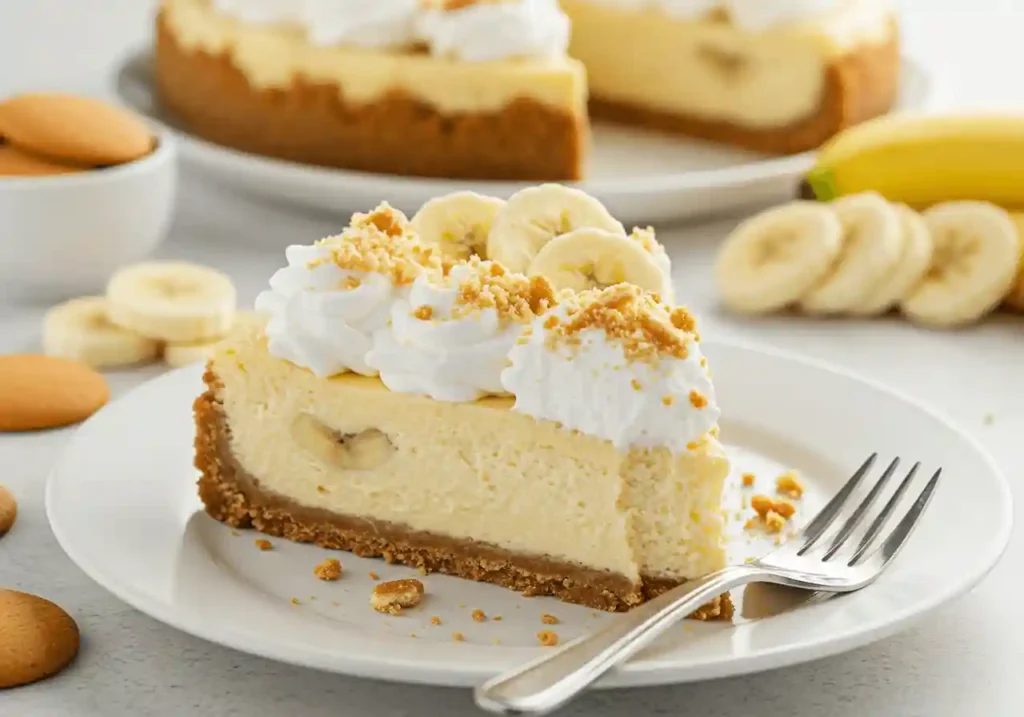
Whipped cream and banana slices create an appealing look and a burst of extra flavor. If you have leftover cheesecake, keep it chilled to maintain its shape and flavor.
Pro Tips and Variations
Banana cheesecake can be adapted in countless ways to suit your taste. Below, you’ll find helpful ideas for baking, ingredient swaps, and flavor twists that bring out the best in this dessert.
Pro Tips for a Perfect Cheesecake
- Choose Ripe Bananas
- Brown spots on the skin mean the bananas have reached a sweeter stage, which boosts flavor. If they still look too green, keep them on the counter for a day or two.
- Brown spots on the skin mean the bananas have reached a sweeter stage, which boosts flavor. If they still look too green, keep them on the counter for a day or two.
- Mix Gently to Avoid Excess Air
- Over-mixing can trap air, which often leads to a puffed center that collapses once it cools. Instead, run the mixer at a moderate speed and pause occasionally to scrape the bowl.
- Over-mixing can trap air, which often leads to a puffed center that collapses once it cools. Instead, run the mixer at a moderate speed and pause occasionally to scrape the bowl.
- Room Temperature Ingredients
- Ensure your cream cheese, eggs, and sour cream aren’t too cold. This helps everything blend smoothly, limiting lumps in the batter.
- Ensure your cream cheese, eggs, and sour cream aren’t too cold. This helps everything blend smoothly, limiting lumps in the batter.
- Preventing Cracks
- A water bath stabilizes temperature in the oven, reducing the chance of splits on top. If you’re worried about water leaking into the springform pan, wrap the outside tightly with aluminum foil or use a silicone wrap.
- Another trick is to leave the cheesecake in the switched-off oven for a short period after baking. This eases the transition from high heat to your kitchen’s cooler air.
- A water bath stabilizes temperature in the oven, reducing the chance of splits on top. If you’re worried about water leaking into the springform pan, wrap the outside tightly with aluminum foil or use a silicone wrap.
- Cool It Properly
- Letting the cheesecake sit at room temperature for about an hour before moving it to the fridge allows the filling to “settle.” Quick changes in temperature may damage that smooth texture.
- Letting the cheesecake sit at room temperature for about an hour before moving it to the fridge allows the filling to “settle.” Quick changes in temperature may damage that smooth texture.
- Keep Sliced Bananas Fresh
- If you plan to garnish the top of the cheesecake with banana slices, place them right before serving to avoid browning. A spritz of lemon juice can help keep them bright, but it may slightly alter the taste.
- If you plan to garnish the top of the cheesecake with banana slices, place them right before serving to avoid browning. A spritz of lemon juice can help keep them bright, but it may slightly alter the taste.
Flavor Variations
- Banana Pudding Cheesecake
- Stir a few tablespoons of banana pudding mix into the filling for a banana pudding cheesecake upgrade. You can also use vanilla pudding if you want a lighter color and gentler banana flavor.
- Stir a few tablespoons of banana pudding mix into the filling for a banana pudding cheesecake upgrade. You can also use vanilla pudding if you want a lighter color and gentler banana flavor.
- Different Crust Options
- Try a nilla wafer crust by swapping the graham cracker crumbs for crushed wafer cookies. You could even cut the recipe in half to make mini cheesecakes in muffin tins.
- Try a nilla wafer crust by swapping the graham cracker crumbs for crushed wafer cookies. You could even cut the recipe in half to make mini cheesecakes in muffin tins.
- Extra Banana Boost
- If you love banana flavor, add a small dash of banana extract to the batter. A little goes a long way, so start with half a teaspoon and taste test before adding more.
- If you love banana flavor, add a small dash of banana extract to the batter. A little goes a long way, so start with half a teaspoon and taste test before adding more.
- Chocolate or Peanut Butter Swirl
- Melt a small amount of peanut butter or chocolate chips and drizzle onto the batter. Give it a gentle swirl with a knife for a marbled design. The sweet notes of banana mix well with these additions.
- Melt a small amount of peanut butter or chocolate chips and drizzle onto the batter. Give it a gentle swirl with a knife for a marbled design. The sweet notes of banana mix well with these additions.
- Caramel or Toffee Drizzle
- Once your cheesecake is cool, warm a bit of caramel or toffee sauce and drizzle it on top. Pair with whipped cream for a decadent finish.
- Once your cheesecake is cool, warm a bit of caramel or toffee sauce and drizzle it on top. Pair with whipped cream for a decadent finish.
Adjusting the Recipe Size
- Double Batch: If you need more servings, double the ingredient amounts and use a larger pan or bake multiple cheesecakes side by side.
- Half Batch: For fewer slices, cut the recipe in half and use a smaller springform pan. Keep an eye on the baking time, as it might finish a bit sooner.
Conclusion
Banana cheesecake stands out as an inviting dessert that joins the sweetness of fresh banana with the rich taste of tangy cream cheese. Whether you prepare a crisp graham cracker crust or opt for a nilla wafer crust, the result remains a creamy showpiece. Each slice reminds some people of banana bread, but with a velvety texture you usually find in a perfect cheesecake. Once you take your time to prepare the cheesecake filling and mix the ingredients carefully, you’ll taste how easily banana flavor can shine.
As this dessert cools and sets, its smooth filling develops a mellow depth that’s hard to resist. Topped with whipped cream or banana slices, your finished cheesecake instantly draws attention at any gathering. With a few thoughtful steps—selecting ripe fruit, balancing flavors, and paying attention to temperature changes—you’ll discover that making a cheesecake from scratch is more approachable than you might think. By the time you serve the cheesecake, you’ll have created a comforting treat that captures the best banana essence in every bite.
FAQs
What Is Banana Cheesecake?
Banana cheesecake is a dessert that blends fresh bananas with a smooth cream cheese mixture. This results in a sweet, tangy combination that’s reminiscent of banana bread but with a soft, velvety texture you only get from cheesecake. It’s typically baked in a springform pan, then chilled to set the filling fully.
What’s the Difference Between Banana Cheesecake and Banana Cream Cheesecake?
Traditional banana cheesecake often relies on mashed bananas stirred into the main cheesecake filling, giving you a steady presence of banana flavor. Banana cream cheesecake usually includes a layer or swirl of banana cream pudding, which adds a more custard-like consistency. Both varieties highlight banana, but the pudding layer in banana cream cheesecake tends to create a lighter, fluffier mouthfeel.
Which Bananas Should I Use for the Best Flavor?
Go for bananas with brown speckles on the peel. These are ripe, sweeter, and offer a more pronounced taste. If you spot green patches or your bananas are too firm, let them sit at room temperature until they develop those trademark brown spots. That way, you’ll get the best possible sweetness in your cheesecake filling.
How Can I Prevent Cracks or a Sunken Center in My Banana Cheesecake?
A few simple techniques reduce the chance of cracking or sinking:
- Don’t Over-Mix: Once the eggs are incorporated, beat just enough to make the batter smooth. Too much air can cause the filling to puff up and then collapse.
- Consider a Water Bath: Wrapping your springform pan in foil and placing it in a larger roasting pan with water regulates the temperature as the cheesecake bakes. This helps keep the surface level.
- Gradual Cooling: After the baking time ends, switch off the oven and leave the door slightly open. Let the cheesecake sit inside for about 15 minutes. This gentle cooling prevents a rapid temperature change that often leads to cracks.
- Room Temperature Ingredients: Start with softened cream cheese and let eggs warm up a bit before mixing. They combine more easily and keep the batter lump-free, reducing the likelihood of structural issues.